Installing an additional Linux distribution on a computer with a double-disk SSD, UEFI interface and pre-installed Ubuntu
Table of Contents
1 The choice of the computer
For this test I looked for a computer having the following features:
- Pre-installed open source operating system
- Simple installation of ad additional solid-state drive
- Cheap price!
I chose an Italian laptop branded Microtech with a little SSD M2 internal disk, (32 Gb), pre-installed OS GNU/Linux Ubuntu and slot for an additional disk under the chassis (€310,00).

Figure 1: The notebook used for this article
To install the additional operating system I, then, purchased a SSD M2 120 GB disk branded Western Digital, (€23,99).
The additional operating system chosen for this test is Manjaro.
2 Assembly and configuration of the additional disk
The first step is the installation of the additional SSD M2 disk in the slot under tha chassis.
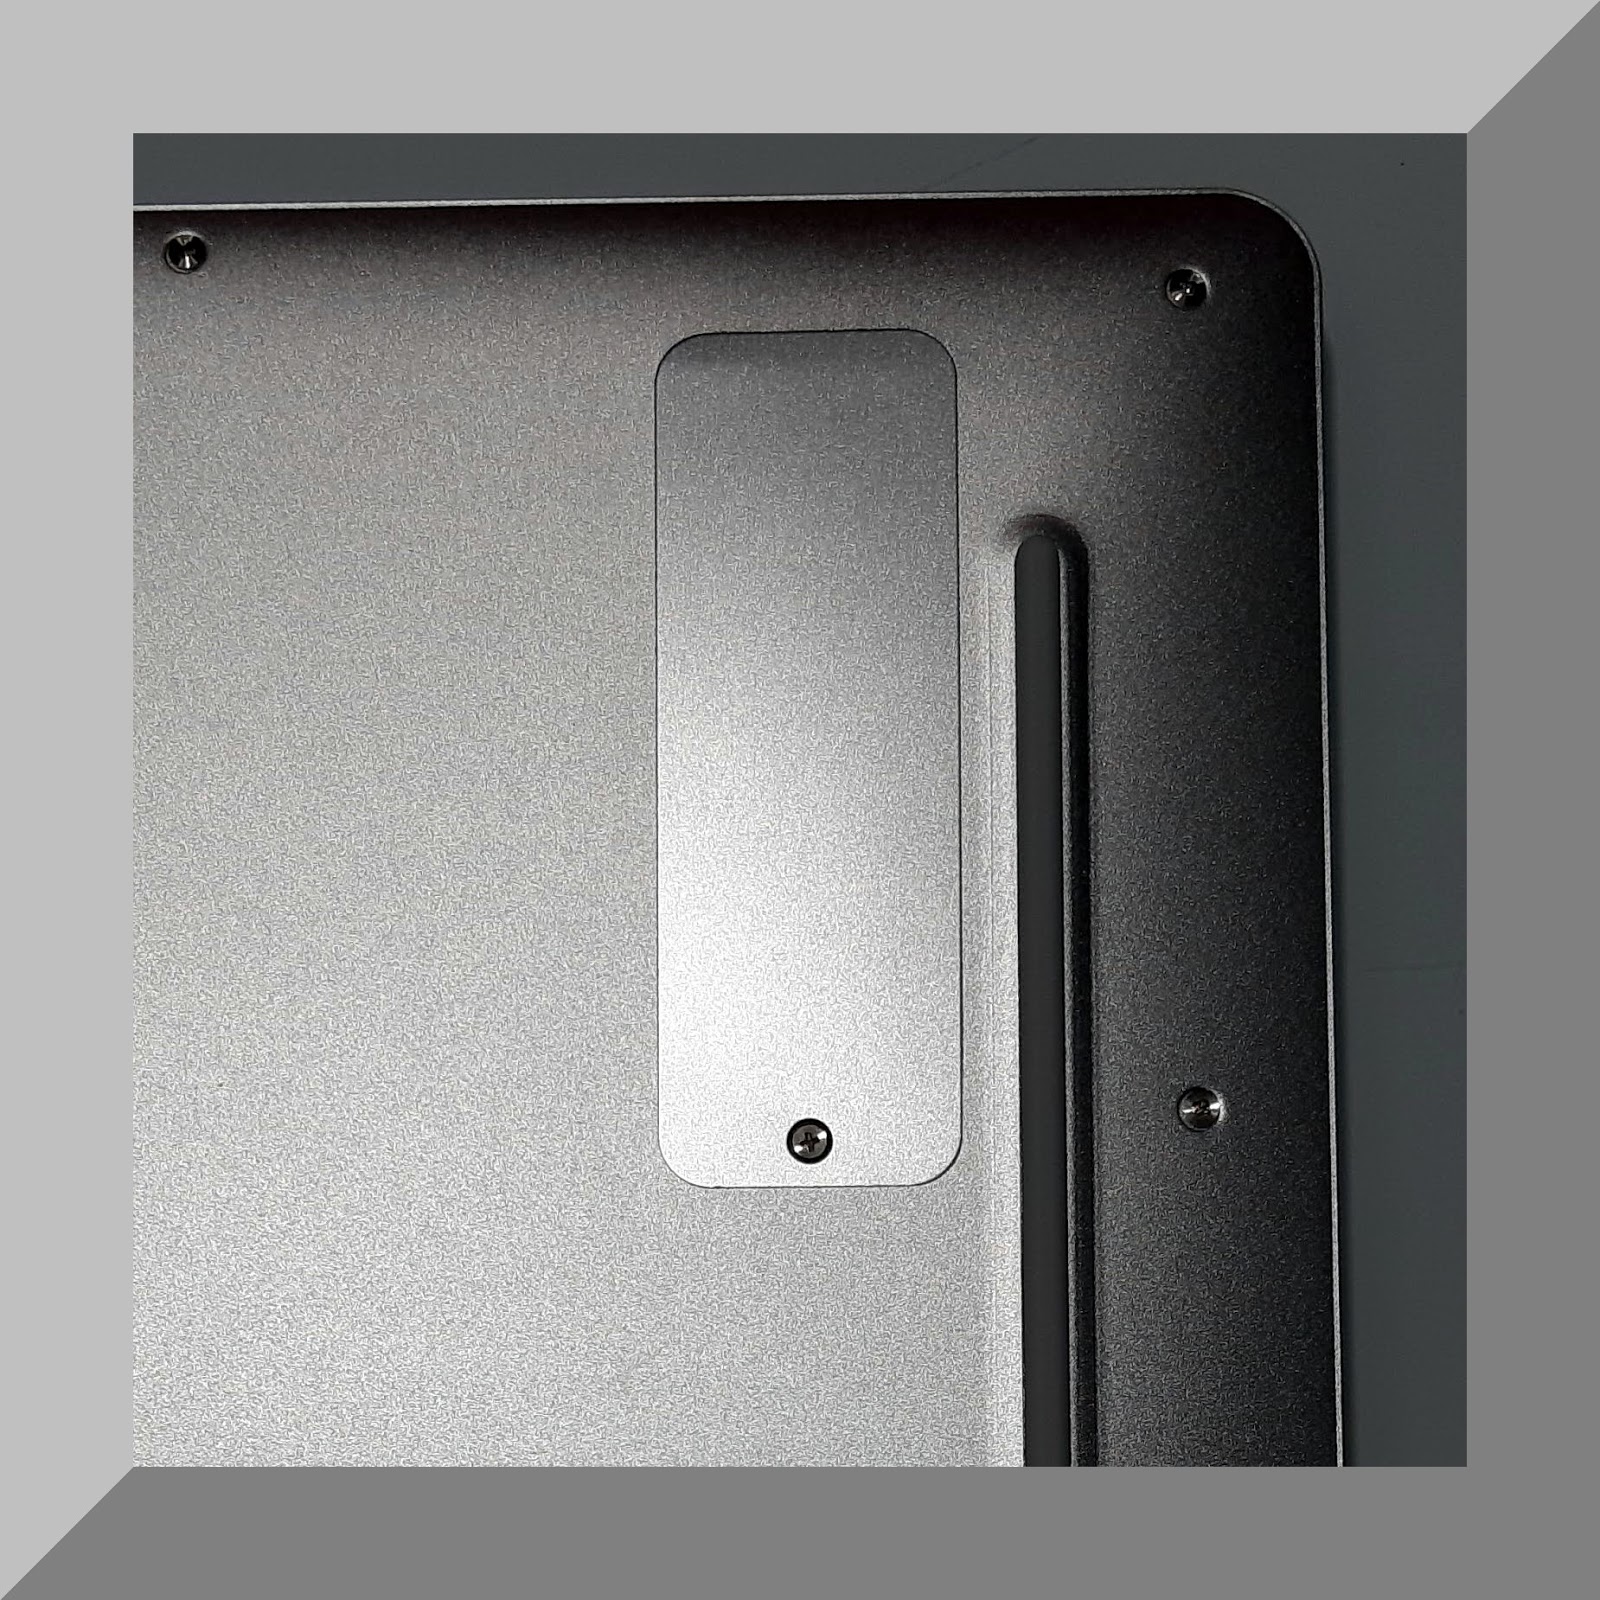
Figure 2: Slot for the additional SSD
You can immediately see the new disk when you run the pre-installed operating system but you cannot use it for booting a new operating system: you have to prepare it for this purpose.
You can use GParted, an excellent open-source software, following these three steps:
- Create a little partizion (about 1mb), FAT32, at the beginning of the additional disk.
- Insert a flag the ESP check box
- Insert another flag in the BOOT check box
You can see the little partition in the following image:

Figure 3: Additional disk partitioning
Now you can start the installation of the new operating system.
3 Installation of the operating system
First of all you need to download the ISO image of the operating system (https://manjaro.org), burn it into a DVD or USB support and start the computer by keeping the support inserted.
After that you have to allocate in the first little partition (the one named ESP created with GParted) the mounting point /boot/efi.
In the Figure n. 3 you can see the mount points sequence in /dev/sda1 and /dev/sda2.
In the partition sda1 there's the EFI mounting point.
In the partition sda2 there's the root mounting point.
The third partition is, for now, empty.
4 A further step, but only in some cases: changing the boot sequence
If the new operating system need to be the first in the boot menu (like Manjaro does) you need also to change the booting drives sequence.
For this purpose you must start the computer by pressing the F2 key, go to the BOOT tab, go down to the last row, press RET to open the Menu Boot EFI and move the voice Manjaro before the Ubuntu one.
You can see the following images.
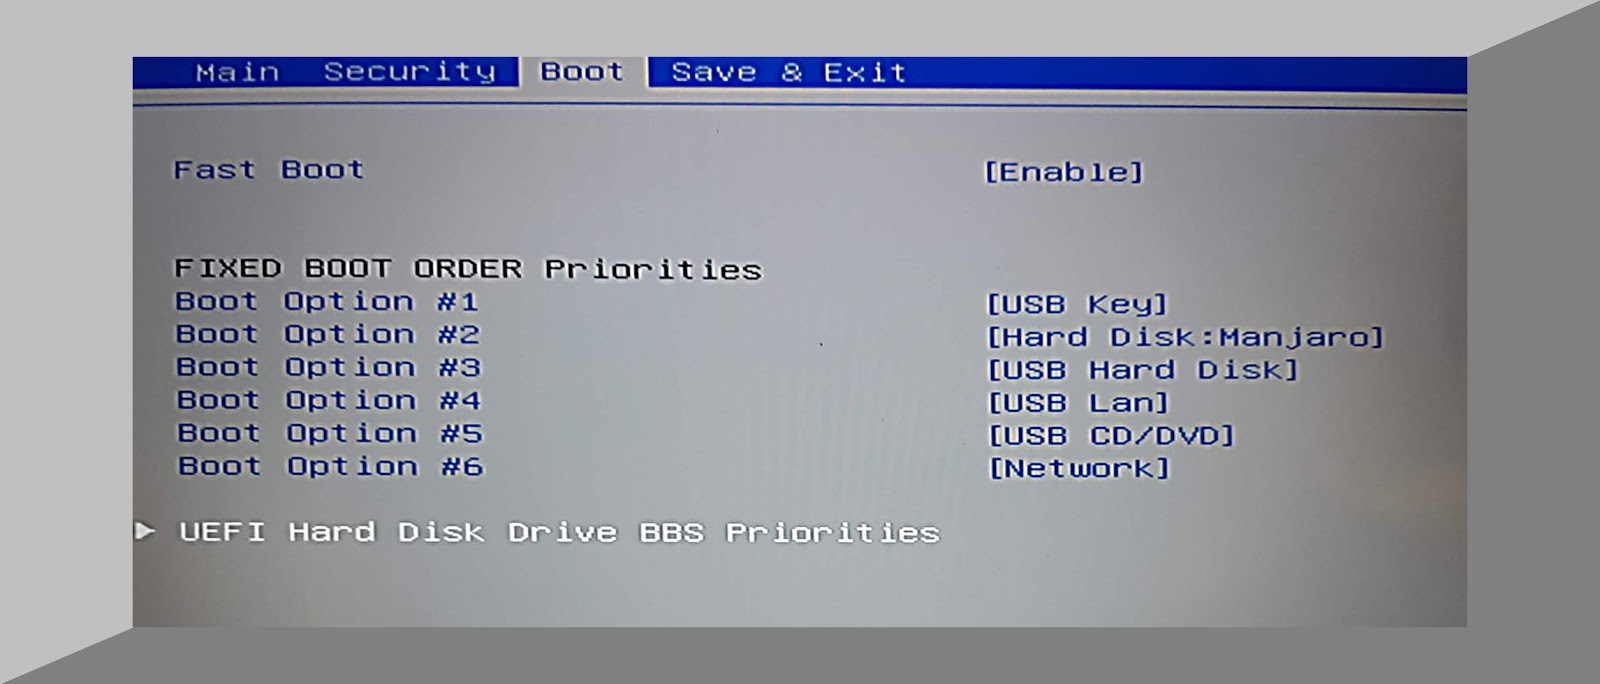
Figure 4: General Boot Menu

Figure 5: EFI Boot Menu
And, now, here to you the boot menu with both operating systems in the menu:

Figure 6: The multiboot when you start the computer
5 Final adjustments: touchpad and resolution
5.1 The tapping enablement in the touchpad
If you need to activate the tapping in the touchpad you must follow these further steps:
- Go to the folder
/usr/share/X11/xorg.conf.d - Open in a text editor the file
40-libinput.conf - Go to the section
InputClasswith the identificator libinput touchpad catchall - Add the string
Option "Tapping" "on"before the word EndSection, save and quit.
The following one is the entire block of code:
Section "InputClass"
 Identifier "libinput touchpad catchall"
 MatchIsTouchpad "on"
 MatchDevicePath "/dev/input/event*"
 Driver "libinput"
 Option "Tapping" "on"
EndSection
Restart the computer and you'll be able to tap on the touchpad.
5.2 Reduce the screen resolution
At the native screen resolution is 1920x1080 FHD the letters may be too small.
To reduce the resolution you can digit the following command: xrandr -s 1600x900.
If you want to maintain the reduced resolution you must follow these steps (assuming you are using Vim):
- Type in a terminal windows:
sudo vim /etc/lightdm/lightdm.conf - Uncomment and modify the line
#display-setup-script=todisplay-setup-script=/etc/lightdm/Xsetup - Create the configuration file
sudo vim /etc/lightdm/Xsetup - Insert in the file the string:
xrandr -s 1600x900 - Make executable the file with:
sudo chmod +x /etc/lightdm/Xsetup - Restart the computer


Comments
Post a Comment